Apex Real Estate Photography Tips for Standout Listings
November 6, 2025
November 6, 2025
You have one chance to make a first impression online, and it happens in seconds. In a fast‑moving Apex market, clean, well‑lit photos can be the difference between a quiet first week and a calendar full of showings. If you want buyers to pause, click, and book a tour, your home needs to be photo‑ready.
This guide gives you a room‑by‑room styling plan, a practical 24‑hour checklist, and smart timing tips tailored to Apex light and buyer expectations. You’ll learn how to highlight character in historic homes, showcase flow in newer builds, and coordinate with a photographer for standout images. Let’s dive in.
Apex is a growing Wake County suburb with a mix of historic downtown properties and newer homes in planned communities. That blend shapes what buyers want to see in photos. Downtown shoppers often look for preserved details that tell a story, while buyers in newer neighborhoods expect bright, open interiors and modern finishes.
Most buyers start their search online. Professional photos and thoughtful staging increase perceived value and listing engagement, which can translate into more showings in the first week. Seasonality matters in the Triangle, with spring and early summer bringing peak traffic, but strong photos are essential year‑round.
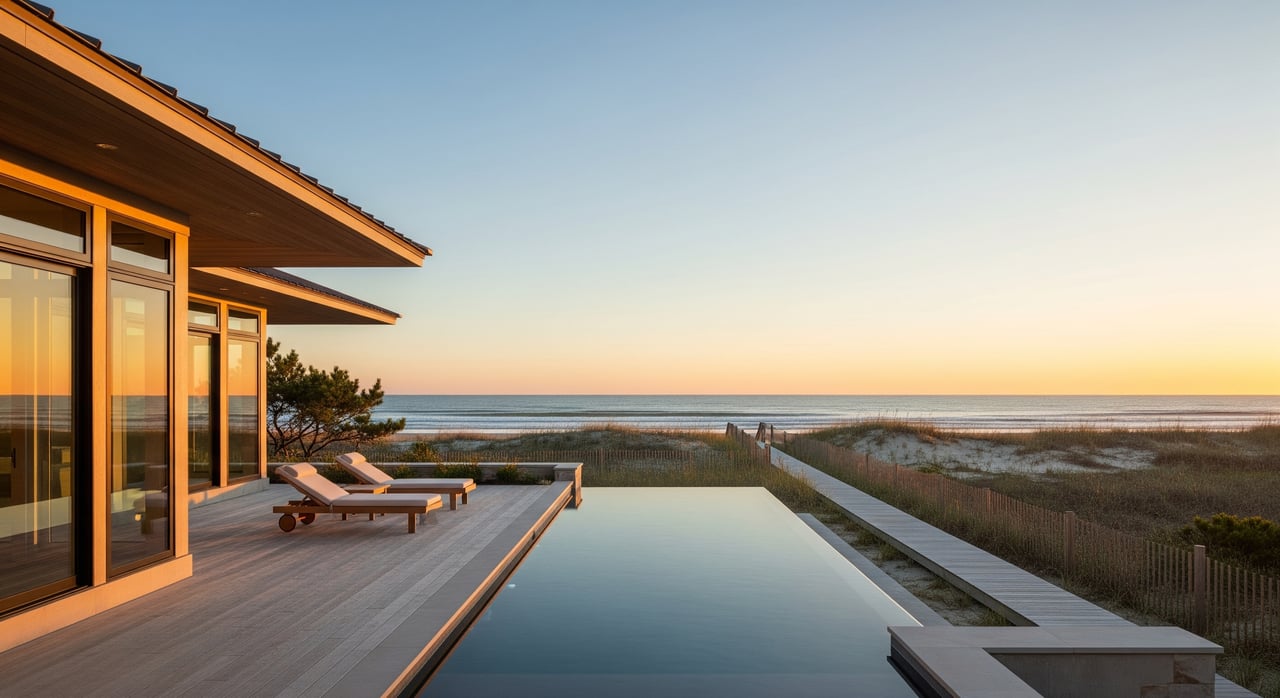
Apex sits near latitude 35.7°N with strong summer sun and shorter winter days. For exteriors, plan for morning or late‑afternoon golden hour when light is softer and shadows are gentle. If the front of your home faces east, morning light usually flatters the facade; west‑facing fronts often look best later in the day.
For interiors, midday sun can create harsh contrast and blown highlights. Overcast days or earlier/later windows often produce more even exposures. If light is intense, use sheer curtains to diffuse it and avoid heavy shadows in photos.
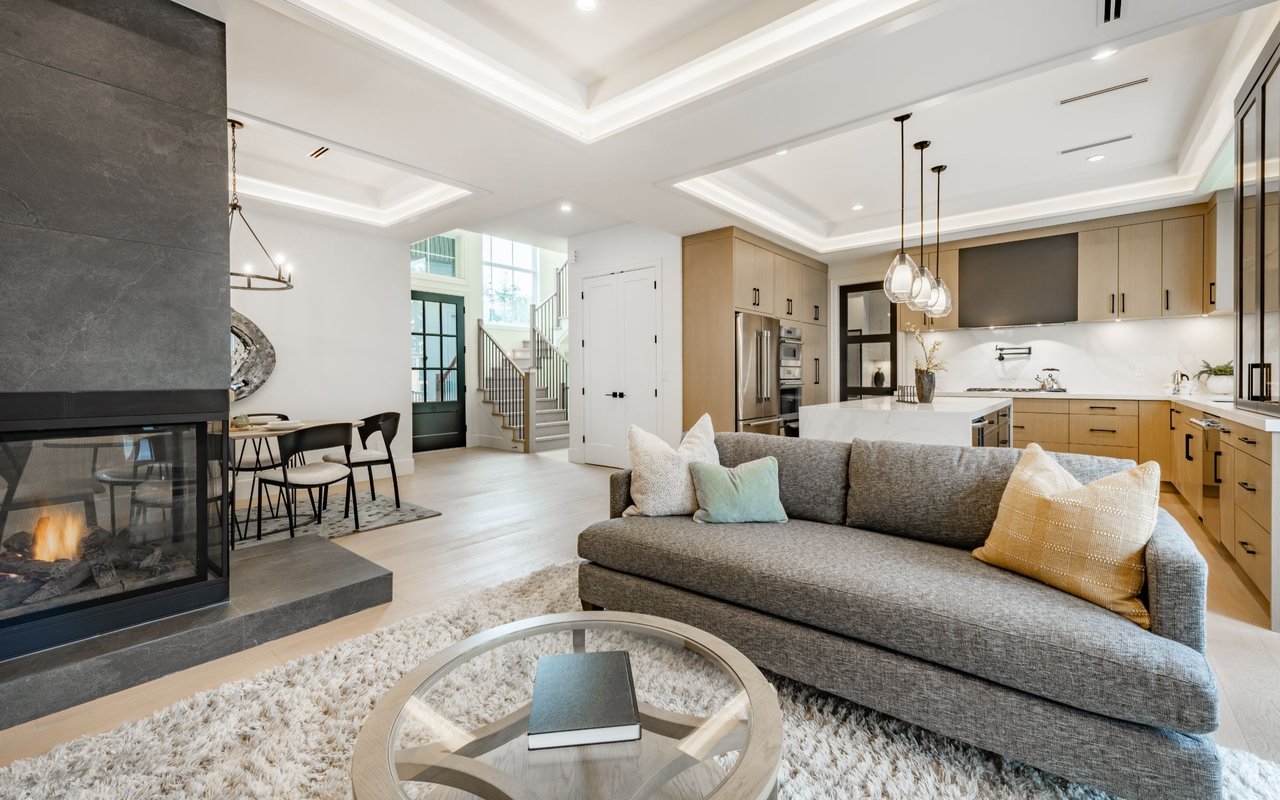
Think of staging for photos as editing your space so buyers can immediately understand flow, size, and function.
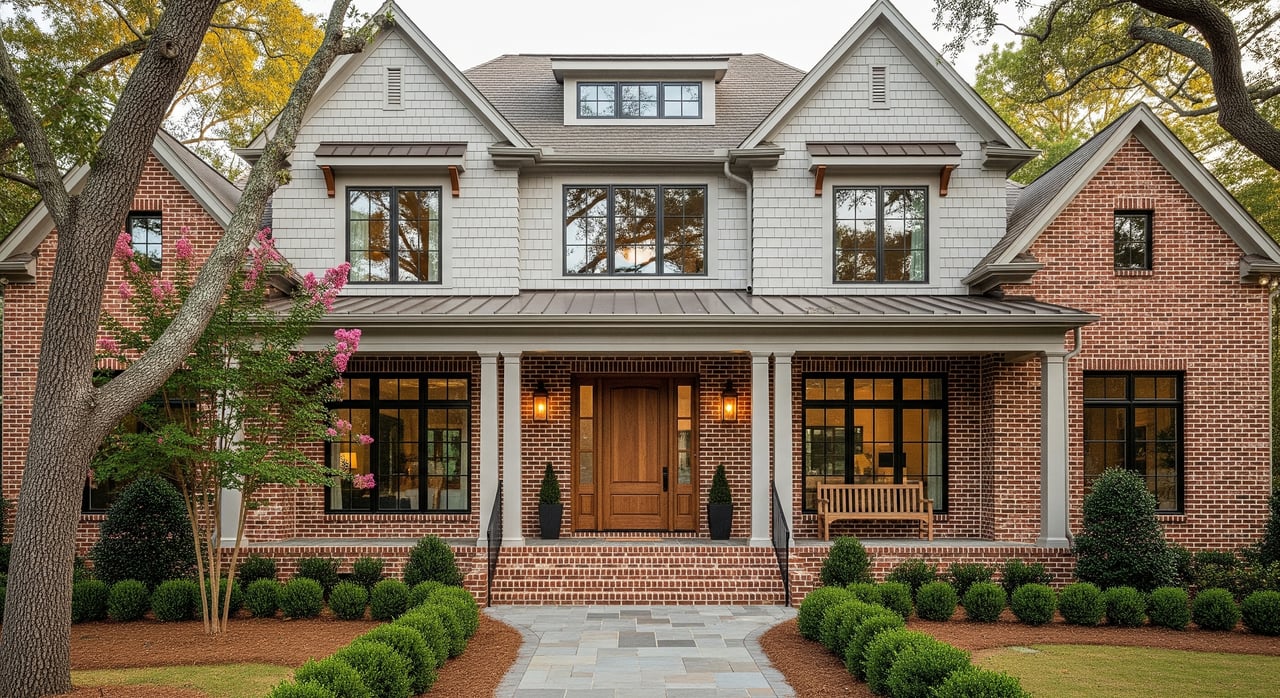
Your front shot is often the first frame buyers see. Mow the lawn, trim shrubs, and sweep the porch. A tidy doormat and one potted plant or a simple chair can signal welcome without clutter. Power‑wash stainedwalkways if needed and clear cars from the driveway before photos.
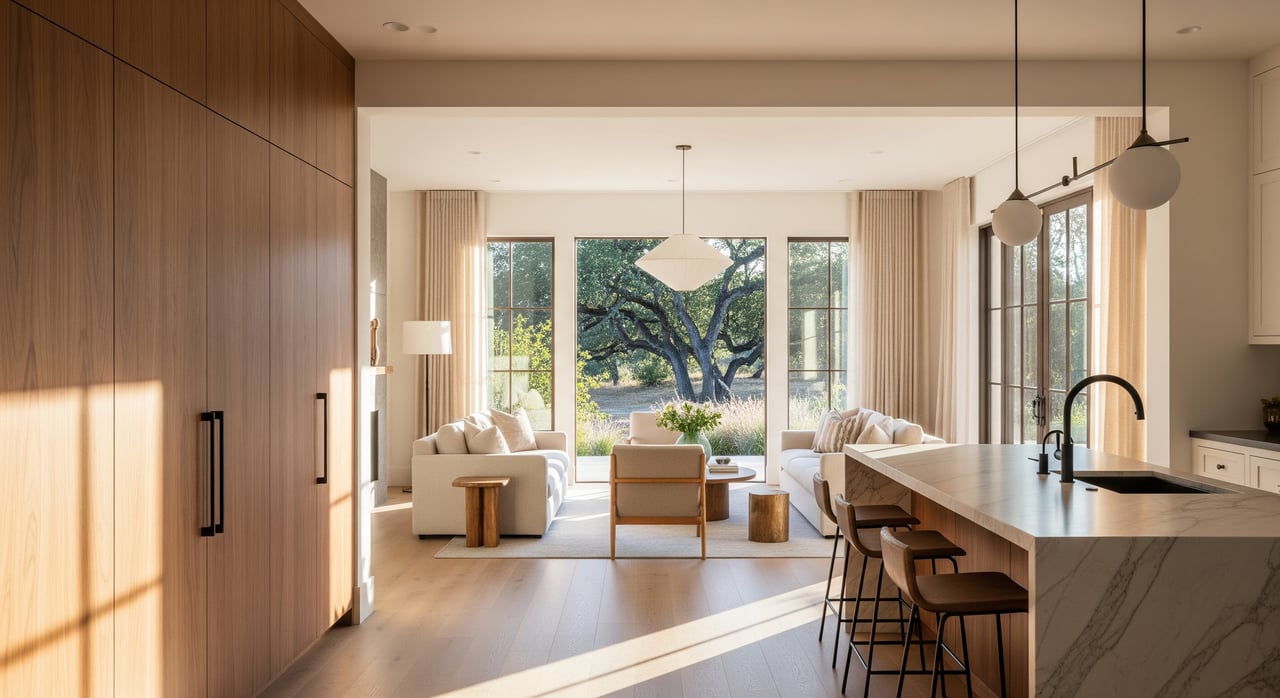
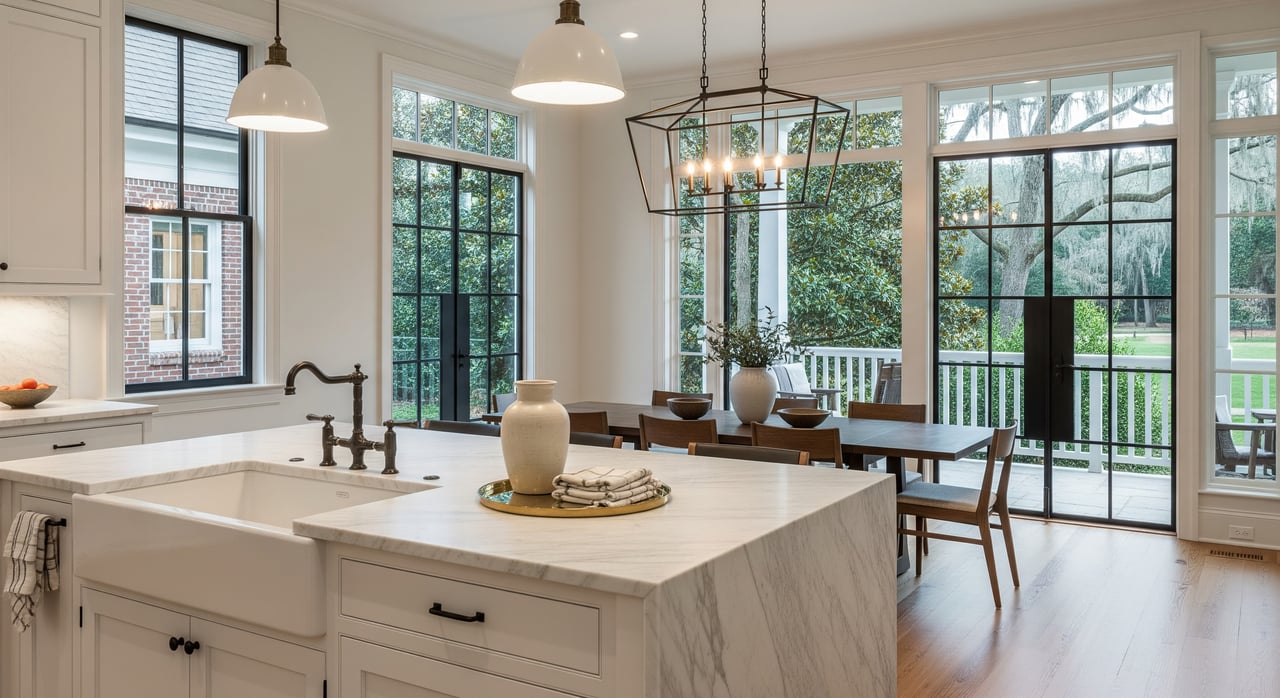
Create a focal point such as a fireplace, view, or built‑ins. Arrange seating to face that feature, then open interior doors to show flow into adjoining spaces. Remove heavy throws and dated patterns, and keep color accents minimal so light and architecture lead the photo.
Clear countertops completely, leaving a single styled element like a bowl of green apples or a simple cutting board. Hide small appliances and fridge magnets. Polish fixtures, empty the sink, and consider a single place setting on the island to show function without clutter.
Set a clean, simple tablescape: a runner and one centerpiece are enough. If the area is tight, remove extra chairs to improve circulation and make the room feel larger on camera. Center the table and align chairs for a crisp, balanced frame.
Use neutral bedding with layered textures and coordinated pillows. Keep nightstands clear except for a lamp and one small item like a book. Store excess furniture to maintain proportion and open floor space. If closets will be shown, tidy and thin them out.
Display fresh white towels and remove toiletries from counters and showers. Replace worn shower curtains and polish mirrors and fixtures. Clean grout and caulk lines so surfaces photograph bright and fresh.
Define the purpose clearly: office, playroom, or workout area. Hide cords, limit desktop items, and add a plant for softness. A tidy, purposeful room helps buyers imagine how they will live in the space.
Add seating, a throw rug, and floor lamps to warm up the space. Keep pathways clear to show scale and flexibility. Ensure egress windows are visible and unobstructed.
Organize shelves, group items in bins, and clear the floor where possible. One or two wide shots that show storage systems and square footage are enough. If cars remain, position them so floors and walls are still visible.
Cut the grass, coil hoses, and remove toys. Stage a small seating group, grill, or dining setup to show function. Schedule outdoor photos for early morning or late afternoon so shade, privacy, and greenery read well on camera.
If your Apex home has historic details like millwork, built‑ins, or a deep front porch, ask your photographer to capture both wide shots and a few tight, detail‑rich frames. In newer subdivisions with open plans, emphasize sightlines among the kitchen, dining, and living areas to convey flow and scale. If your home sits in a historic district or HOA community, make sure any exterior styling choices align with guidelines.
Use this timeline if your photographer is scheduled for Day 1. Adjust based on appointment time and your property’s needs.
Choose a photographer with local real‑estate experience and Apex/Wake County listings in their portfolio. Confirm they shoot in RAW, use HDR or exposure bracketing for balanced interiors, and are familiar with MLS requirements. Ask about turnaround time, insurance, and optional services like drone or twilight exteriors.
Provide a concise brief: request horizontal compositions, natural‑looking edits, and a mix of wide and detail shots. Typical focal lengths in the wide range help rooms look spacious yet accurate. Ask for both high‑resolution JPEGs for MLS and web‑optimized versions for speed.
Suggested shot list:
Respect privacy in all photos by removing identifiable documents and personal items. If using a drone, follow FAA rules and confirm pilot certification.
Virtual tours and floor plans can boost online engagement by showing flow and scale. Pairing these with strong photos gives buyers confidence to book a showing.
You do not have to do this alone. With a design‑forward approach and deep familiarity with Apex homes, you can streamline prep, staging, photography, and launch. From edit lists that prioritize the most photo‑visible fixes to coordinating pro photography and virtual tours, a curated plan makes your first week count.
If you want guidance tailored to your home’s light, layout, and neighborhood, let’s talk. Schedule a Consultation with Donna Mechura to build a photo‑ready plan and a standout launch.
Stay up to date on the latest real estate trends.


I am committed to guiding you every step of the way—whether you're buying a home, selling a property, or securing a mortgage. Whatever your needs, I've got you covered.